Sew-on patches win on durability every time heavy wear, frequent washing, or heat-sensitive fabric is involved, because thread does not depend on an adhesive bond. Iron-on patches win on speed for low-stress decoration when the fabric can handle heat. When you are not sure which camp your project falls into, iron the patch on for placement, then stitch the perimeter if desired for additional hold. This hybrid approach combines placement accuracy with increased durability.
TL;DR:
- Sew-on patches provide superior durability for frequent washing, heavy abrasion, and heat exposure, making them ideal for workwear and outdoor gear.
- Iron-on patches are quicker to apply and best suited for low-stress, short-term uses on cotton and similar fabrics that can tolerate heat.
- Combining ironing for placement with stitching for long-term hold offers a reliable solution when unsure about adhesive performance or fabric durability.
- Proper application of heat-activated adhesive depends on fabric type, pressure, and time, with synthetic or waterproof fabrics often unsuitable for ironing.
- Testing patches on actual fabric and ordering samples before bulk production helps prevent failure and ensures the attachment method matches the intended use.
Table of Contents
- Iron-On or Sew-On Patches: A Quick Comparison
- Why Sew-On Patches Are the Durable Default
- How Iron-On Adhesive Actually Bonds to Fabric
- What Fabrics Should Never Be Ironed
- How to Apply an Iron-On Patch Safely
- How to Sew On a Patch by Hand or Machine
- When to Combine Both Methods
- Caring for a Patched Garment Over Time
- Specifying Patches for a Business or Bulk Order
- Which Attachment Method Actually Holds Up? A Straight Answer
- Get Custom Patches Made for Your Exact Backing Choice
- Sources
- FAQ
Iron-On or Sew-On Patches: A Quick Comparison
The core difference comes down to physics, not preference. Iron-on patches use a heat-activated adhesive that bonds when pressed at the right temperature. Sew-on patches attach mechanically with needle and thread, which is why they hold up under conditions that would eventually break down an adhesive layer.
Here’s how the two stack up for common projects:
- Sew-on patches: Best for uniforms, work jackets, backpacks, and outdoor gear. Pros: withstands industrial laundering, heavy abrasion, and repeated stretching. Cons: takes longer to attach and requires basic sewing skill.
- Iron-on patches: Best for kids’ clothing, event giveaways, cotton tees, and quick craft projects. Pros: fast, no needle required, looks clean on flat surfaces. Cons: weak on heat-sensitive fabric, curved seams, or anything that sees a commercial dryer often.
- Hybrid approach: Best when you want the speed of ironing with the staying power of stitching. Pros: accurate placement plus long-term hold. Cons: still requires a needle and a few extra minutes.
If the garment goes through commercial laundering or gets worn daily for months, lean sew-on. If it’s a one-off gift or a soft-cotton shirt, iron-on usually does the job.
Why Sew-On Patches Are the Durable Default
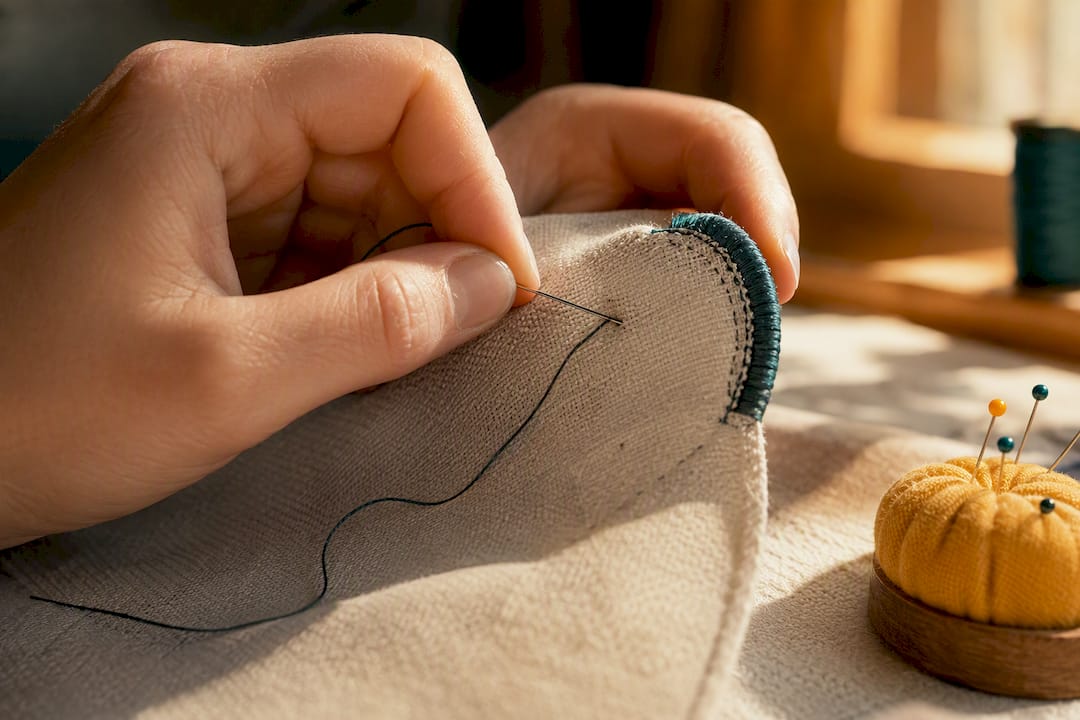
Mechanical fastening doesn’t care about heat, humidity, or detergent chemistry. A stitched patch stays put because thread is physically looping through both the patch and the fabric. That’s why sew-on is the safer default for workwear, uniforms, and outdoor gear that cannot tolerate an iron in the first place.
Stitch choice matters more than most people expect:
- Whipstitch: Fast, simple, works well on merrowed-edge patches with a rounded border.
- Straight stitch (machine): Cleanest look for squared patches on flat panels like jacket backs or cap fronts.
- Zigzag stitch: Adds flexibility and covers a slightly frayed edge better than a straight line.
Machine sewing is faster and more consistent for bulk orders, while hand sewing gives you more control on curved surfaces like caps or sleeves. Use a heavier polyester thread and a sharp needle sized for the fabric weight, and always knot or backstitch your finish so the thread doesn’t work loose after a few wash cycles.
Pro Tip: Sew from the back side when you can. It hides your knots and keeps the front of the patch looking factory-clean.
How Iron-On Adhesive Actually Bonds to Fabric
Heat-seal adhesive isn’t one universal formula. Bond strength depends on polymer type, film thickness, the pressure you apply, and how long you hold the heat. That’s why manufacturer instructions matter more than a generic “iron on medium for 30 seconds” rule you might see online. Performance really is product-specific, and wash-life claims that sound impressive on one fabric can fall apart on another.
A household iron works fine for single items and small projects. A heat press earns its keep once you’re running multiples, because it holds even pressure and temperature across the whole patch instead of relying on your arm.
One tested sequence from a university embroidery program presses adhesive at about 330°F for 10 to 15 seconds, then flips the garment and repeats on the reverse side for a few more seconds. That example illustrates the idea, not a universal setting.
Most iron-on failures trace back to three causes:
- Not enough pressure, so the adhesive never fully melts into the fabric weave.
- Wrong temperature or time for that specific adhesive and fabric combination.
- Applying it to a stretchy or textured surface where the bond can’t sit flat.
What Fabrics Should Never Be Ironed
Cotton, denim, canvas, and most cotton-blend garments accept heat well, which makes them the easiest candidates for iron-on application. Leather, vinyl, waterproof shells, and many synthetic blends are a different story. Heat can melt, warp, or permanently discolor these materials before the adhesive even sets.
Before committing to a full application, test heat tolerance on a hidden seam allowance or inside hem. Always check the garment’s care label first. A “low heat only” or “do not iron” symbol overrides any patch instructions.
- Curved surfaces like caps need a heat press with a curved attachment or careful hand pressing.
- Foam-backed hats and structured caps often can’t handle sustained heat without deforming.
- Anything labeled dry-clean-only should go sew-on, no exceptions.
How to Apply an Iron-On Patch Safely
- Set the garment on a flat, heat-safe surface and place the patch exactly where you want it.
- Lay a thin pressing cloth over the patch to protect both the patch color and the iron plate.
- Check the garment’s care label for the maximum safe temperature, and skip steam entirely.
- Press firmly for the time specified in the patch instructions, then flip the garment and repeat from the back.
- Let the area cool completely before checking the bond. A patch that looks stuck while still warm can lift once it cools.
If the edges lift after the fabric cools, re-press with firmer, even pressure. If it still won’t hold, stitch the perimeter rather than fighting the adhesive further.
Pro Tip: Apply the adhesive backing before trimming the patch loose from its production backing. It keeps the process cleaner and stops you from accidentally cutting into the embroidered border.
How to Sew On a Patch by Hand or Machine
- Mark your placement with a fabric pen or tailor’s chalk, then pin the patch in place so it can’t shift while you work.
- Choose a thread color that either matches the patch border or intentionally contrasts, and pick a needle suited to the fabric weight.
- For hand sewing, work a whipstitch or backstitch around the perimeter, keeping stitches close together for a clean, secure line, and finish with a hidden knot on the inside of the garment.
- For machine sewing, use a straight or zigzag stitch at a slower speed, and back a stretchy fabric with a stabilizer to prevent puckering underneath the patch.
When to Combine Both Methods
Ironing a patch on first, then stitching around the edge, gives you accurate placement without pins slipping mid-stitch, plus the long-term hold sewing provides on its own. Industry guidance consistently points to this combined approach as the practical middle ground for most everyday projects.
- If you need a patch to be removable or swappable, skip adhesive backing entirely and use hook-and-loop (Velcro) or a snap system instead.
- Removing an iron-on patch later often leaves adhesive residue, discoloration, or fabric distortion behind.
- Removing a sewn patch leaves visible stitch holes, which is usually the less damaging option on sturdier fabric.
Caring for a Patched Garment Over Time
Conservative laundering protects both the adhesive bond and the stitching. Turn garments inside out, wash on a cool setting, skip bleach, and air-dry or tumble on low heat when possible. That guidance lines up with manufacturer recommendations for heat-sealed textile products.
- Never run a hot iron directly over the patch itself once it’s applied.
- Check corners and edges periodically for lifting or loose threads.
- Re-stitch a loosening edge early. Waiting until it’s half detached means redoing the whole patch.
Specifying Patches for a Business or Bulk Order
Ordering patches for a team, a product line, or an event means treating the decision like a spec sheet, not a guess. Include the design file, patch material, backing type, the actual garment fabric it’s going on, expected washing conditions, and where on the garment it will sit.
- Request a complimentary sample before committing to a full run.
- Test the sample through a real wash cycle or a press test on the actual fabric, not a similar-looking substitute.
- Finalize backing choice at the sample stage. A patch that presses cleanly on a sample swatch can still fail on the actual production garment if the fabric differs even slightly.
Businesses that skip sample testing are the ones who end up with a warehouse full of patches that peel after one wash. A quick round of testing on your actual garment catches that problem before it becomes a bulk-order mistake.
Which Attachment Method Actually Holds Up? A Straight Answer
Durability wins arguments that appearance can’t. My stance: default to sew-on or hybrid for anything that will be washed repeatedly or worn hard, and reserve pure iron-on for soft cotton and short-term use. Test a sample on your actual fabric before you commit to a full order.
— Bilal
Get Custom Patches Made for Your Exact Backing Choice
If you’ve read this far, you already know the backing decision depends on your fabric, your wash conditions, and how the patch will actually be worn. That’s exactly the kind of decision Leeembroidery is built to help with. Every order comes with complimentary samples so you can run your own press test or wash test before committing to a full production run, and quotes turn around fast enough that you’re not stuck waiting to make a call.

Leeembroidery makes embroidered patches, woven patches, PVC, leather, and printed patches with your choice of sew-on, iron-on, peel-and-stick, or Velcro backing, so you’re not locked into one attachment method before you’ve tested it on your own garment. Custom patch orders start from $99, and if your project needs artwork prepped for embroidery first, the digitizing service covers left chest, cap, and jacket back placements. Request your free sample and quote today, and make the backing call with real fabric in hand instead of a guess.
Sources
- School of Art & Design — Tutorial: Hooping fabric / applying iron-on adhesive
- Avery Dennison — Heat-seal product information
- OurKnots — Sew vs iron-on patches
FAQ
Is It Better to Iron-On or Sew On Patches?
It depends on how the garment will be used. Sew-on holds up better under frequent washing, heavy wear, and heat-sensitive fabric, while iron-on is faster for low-stress decoration on cotton or denim that can safely take heat.
How Can I Tell if a Patch Is Iron-On or Sew-On?
Flip the patch over and look at the backing. A smooth, slightly shiny or plastic-feeling layer usually means heat-activated adhesive, while a plain woven or felt backing with visible fabric texture typically means it’s meant to be sewn.
Can I Still Sew On an Iron-On Patch?
Yes, and it’s often the smarter move. Ironing the patch on first locks it in place for accurate positioning, then stitching around the perimeter adds the long-term hold that adhesive alone can’t guarantee.
Do Iron-On Patches Actually Stay On?
They can, but performance varies by adhesive type, fabric, and how closely you followed the pressing instructions. Conservative laundering, meaning a cool inside-out wash with no bleach, extends the hold, while regular hot washing or commercial dryers tend to shorten it.
What Backing Options Does Leeembroidery Offer?
Leeembroidery produces patches with sew-on, iron-on, peel-and-stick, or Velcro backing across embroidered, woven, PVC, leather, and printed patch styles. Every order includes a complimentary sample so you can test the backing choice on your own fabric before a full run.